This guide is intended to help you building the Ultima Ratio Eurorack Module from a Kit.
The guide is for the revised version 1.2 of the PCB. This should be labeled bottom right on the smaller PCB.
If not, see the instructions to build the older version.
The Ultima Ratio is considered to be an easy to intermediate build with a low part count.
All components are "through hole" and there is no wiring involved.
Still, some of the solder joints on the IC sockets and headers are very close to each other and you should have enough practice to solder these without shorten them out. The warranty covers only defective parts (those you didn't destroy yourself), so you have to be confident in your skills and know what you are doing.
That said: if you manage to build your Ultima Ratio you will feel like an evil mad scientist. So heat up your soldering iron in your secret vulcano missile base and go for it!

Start with soldering the resistors on both PCBs
Be patient with R15, R16, R18. These resistors are connected to ground on one side. That means the solder will not "glue" as easily. If you have problems try to increase the heat on your soldering iron for these joints.

Solder the diode and the quarz crystal on the small PCB.
Orientation of the crystal does not matter but on the diode it is vital!
Align the stripe on the diode with the mark on D1 on the PCB.

Check the orientation of the IC sockets IC1 and IC2 and align the notches on the PCB. Put them in the PCB, turn the PCB upside down and solder swiftly and confidently the 14 plus 28 solder joints.
Double check for any shorting!

1. Solder the two small ceramic capacitors C3 and C4. They have the same specs. Orientation does not matter on these.
2. Solder the electrolytic capacitors C1 and C2.
C1 is the smaller 3.3 μF capacitor, C2 is the bigger 33.0 μF capacitor. Orientation is vital on these!
The longer leg is +, so put the short leg in the square hole labeled as -.
There is also a stripe on the capacitors which should face to -.
3. Solder the double row 10 pin power header. Be careful to check the right orientation, else the keyed power cable won't fit later.

Bend the legs of the power regulator with a plier to 90 degrees...

... and solder the power regulator on the small PCB.
Be prepared, the middle pin is connected to ground and therefore the hardest pin to solder.

There are three header connections on the PCBs: One with 4, one with 8 and one with 10 pins.
Connect all the male and female header parts, then stick them in the PCBs. Female headers are connected to the large PCB.
Do your best to keep the PCBs as parallel as possible and solder all the joints (22 on each side).
It may help to just solder the two outer pins on each header first and then continue with the remaining ones.

Carefully pull the PCBs apart again.
Solder the transistor Q1 on the large PCB. Orientation is vital.
Normaly you have to align the transistor with the marking on the PCB.
But unfortunately the orientation on the PCB does not match with the pinning of the provided transistor.
You have to mount and solder the transistor rotated by 180° like in the photo shown below!

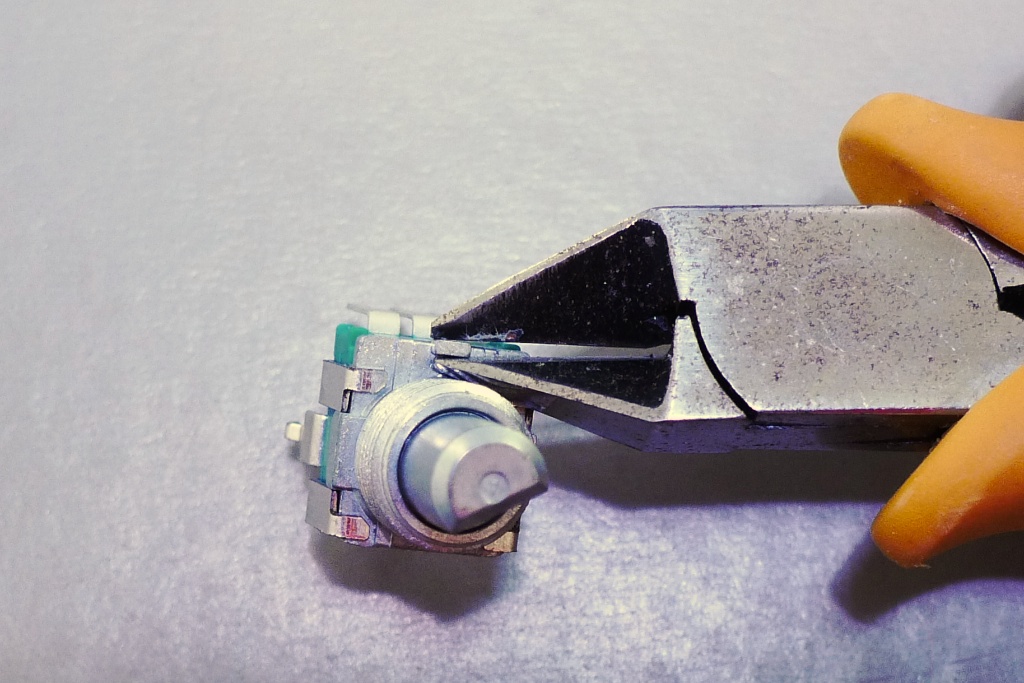
Prepare the four potentiometers by clipping the upper unnecessary thingies with a cutting plier.
Wear eyeprotection! These things are deadly shrapnels.
Edit: it should also be possible to just bend the thingies several times back and forth with a standard plier until they go off.

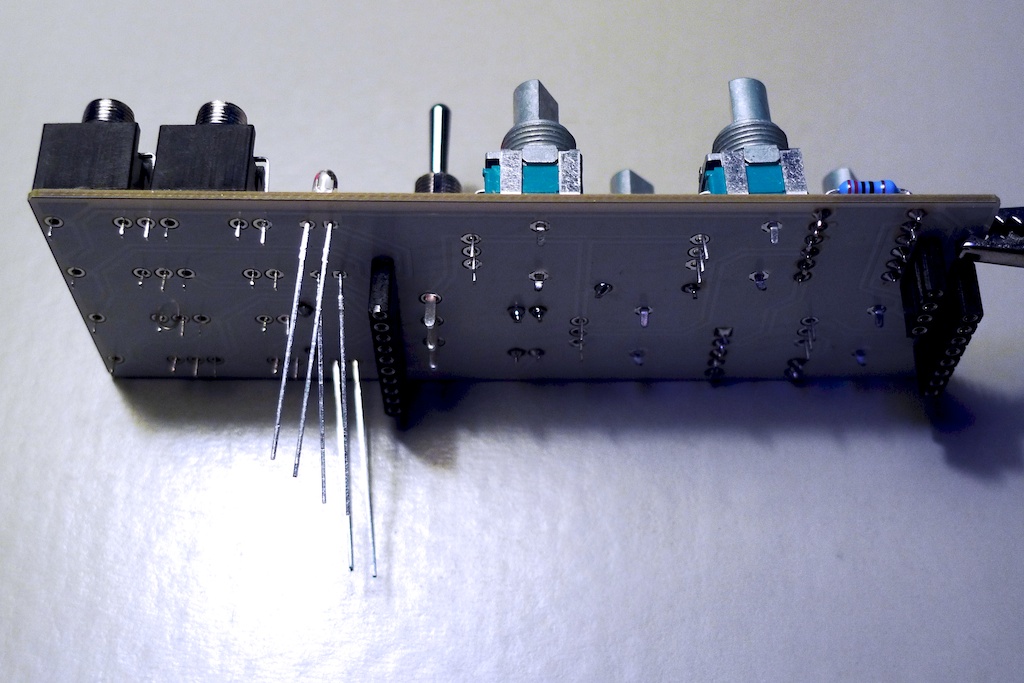
Mount all potentiometers, jack sockets, the switch and LEDs, but don't solder yet.
Read ahead for instructions on how to mount the different parts.

Mount the potentiometers by applying some soft force and they should click in the PCB.
Mount the jack sockets on the PCB. Every socket has three pins, the external ground pin is facing up to the top of the PCB.
Don't solder yet.

Mount the switch. Orientation does not matter. Don't solder yet.
Stick the green LED to LED1 and the two blue LEDs to LED2 and LED3.
Orientation is vital. The longer leg of every LED goes into the square hole which unfortunately is hard to see.
Everything is right if the long legs face "north" to the top of the PCB.
Don't solder yet.
Instead mount the Faceplate carefully.
If everything fits put the nuts on the potentiometers, on the switch and on the jack sockets and tighten them.

Turn the module upside down. The LEDs should fall into the drill holes in the Faceplate through the miracle of gravity.
Cosmetic: if you don't want that the LEDs protrude the panel, temporary put a stripe of adhesive tape on the panel.


Gently push the 14 pin DA converter and the 28 pin microcontroller in the sockets of the small PCB. Orientation is VERY vital.
Align the notches on the ICs with the notches on the sockets.

Just put the knobs on the potentiometers.
Typically it is best to leave some space between the knobs and the potentiometers to prevent grinding of the knobs.


If something is not working as expected, as always, check your solder joints first.
Look for cold joints or shortened ones.
| Amount | Part Type | Label | Properties |
|---|---|---|---|
| 1 | Electrolytic Capacitor | C1 | package 100 mil [THT, electrolytic]; capacitance 3.3µF; voltage 6.3V |
| 1 | Electrolytic Capacitor | C2 | package 100 mil [THT, electrolytic]; capacitance 33µF; voltage 16V |
| 2 | Ceramic Capacitor | C3, C4 | package 100 mil [THT, multilayer]; capacitance 15pF; voltage 0.1kV |
| 1 | Rectifier Diode | D1 | package 300 mil [THT]; type Rectifier; part # 1N4001 |
| 1 | Atmega328 | IC1 | package dip; version Atmega328-20PU; type ATMEGA328; variant dip28 THT; part # ATMEGA328P-PU |
| 1 | MCP4922 | IC2 | package DIP (Dual Inline) [THT]; hole size 1.0mm,0.508mm; true; pins 14; pin spacing 300mil |
| 1 | Green LED - 3mm | LED1 | package 3 mm [THT]; leg yes; color Green (570nm) |
| 2 | Blue LED - 3mm | LED2, LED3 | package 3 mm [THT]; leg yes; color Blue |
| 1 | Red LED - 3mm | package 3 mm [THT]; leg yes; color Red | |
| 1 | BF245C N-channel FET Transistor | Q1 | package TO92 [THT] |
| 13 | 220 Ω Resistor | R1-R12 | package THT; tolerance ±5%; bands 4; resistance 220Ω; pin spacing 400 mil |
| 1 | 1k Ω Resistor | R13 | package THT; tolerance ±5%; bands 4; resistance 1kΩ; pin spacing 400 mil |
| 1 | 4.7k Ω Resistor | R14 | package THT; tolerance ±5%; bands 4; resistance 4.7kΩ; pin spacing 400 mil |
| 3 | 10k Ω Resistor | R15, R16, R17 | package THT; tolerance ±5%; bands 4; resistance 10kΩ; pin spacing 400 mil |
| 1 | 1M Ω Resistor | R18 | package THT; tolerance ±5%; bands 4; resistance 1MΩ; pin spacing 400 mil |
| 1 | Voltage Regulator - 5V | package TO220 [THT]; voltage 5V | |
| 1 | Crystal | package THT; frequency 16 Mhz; type crystal; pin spacing 5.08mm | |
| 1 | Generic double row male header - 10 pins | package THT; hole size 1.0mm,0.508mm; row double; form ♂ (male); pins 10; pin spacing 0.1in (2.54mm) | |
| 1 | Generic male header - 10 pins | package THT; hole size 1.0mm,0.508mm; row single; form ♂ (male); pins 10; pin spacing 0.1in (2.54mm) | |
| 1 | Generic female header - 10 pins | package THT; hole size 0.7mm,0.508mm; row single; form ♀ (female); pins 10; pin spacing 0.1in (2.54mm) | |
| 1 | Generic male header - 8 pins | package THT; hole size 1.0mm,0.508mm; row single; form ♂ (male); pins 8; pin spacing 0.1in (2.54mm) | |
| 1 | Generic female header - 8 pins | package THT; hole size 0.7mm,0.508mm; row single; form ♀ (female); pins 8; pin spacing 0.1in (2.54mm) | |
| 1 | Generic female header - 4 pins | package THT; hole size 0.7mm,0.508mm; row single; form ♀ (female); pins 4; pin spacing 0.1in (2.54mm) | |
| 1 | Generic male header - 4 pins | package THT; hole size 1.0mm,0.508mm; row single; form ♂ (male); pins 4; pin spacing 0.1in (2.54mm) | |
| 1 | DIP socket - 14 pins | Example | |
| 1 | DIP socket - 28 pins | Example | |
| 4 | Knobs | E.G. Volcano knob VC-MINI | |
| 4 | Potentiometers 10k Ω linear | E.G. Alps RK09L1140A66 | |
| 1 | Switch SPDT On-On | E.G. Gemini A101SYCQ04 | |
| 8 | Jack Sockets - 3.5mm | E.G. Thonkiconn |
Ultima Ratio on ModularGrid
0.0079s